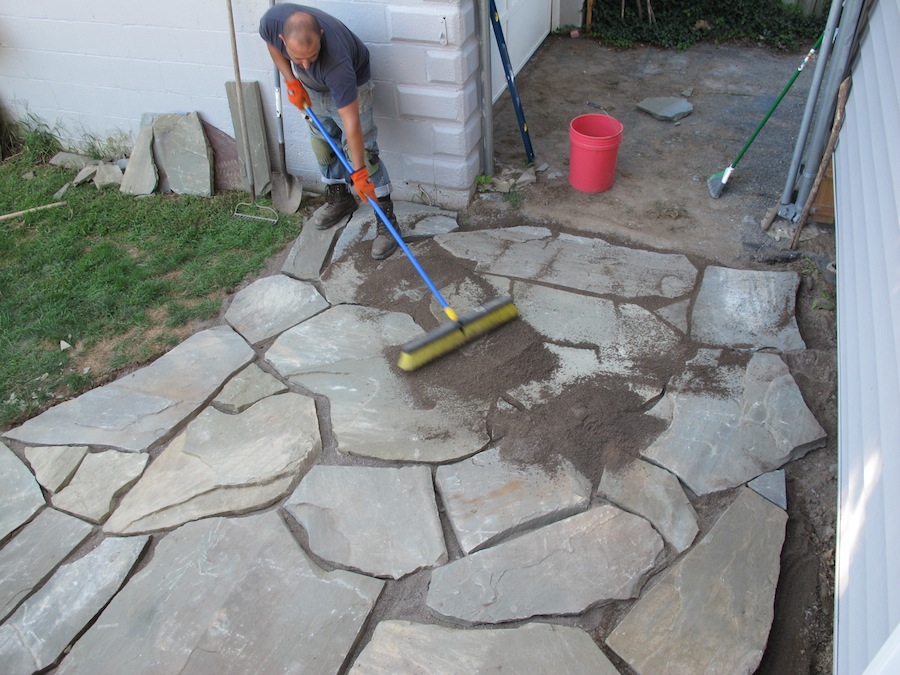
How to DIY a Flagstone Patio
Adding a flagstone patio to your backyard can significantly enhance its beauty and functionality. Flagstone, a type of natural stone, offers a rustic charm and durability, blending seamlessly with various landscaping styles. While constructing a patio from scratch may seem daunting, a DIY approach can be a fulfilling and cost-effective project. This comprehensive guide provides a step-by-step process for creating a stunning flagstone patio.
1. Planning and Preparation
Before embarking on the actual construction, meticulous planning is crucial for a successful outcome. This involves determining the location, size, and shape of the patio, as well as gathering the necessary materials and tools.
First, choose the ideal spot for your patio. Consider factors such as sunlight exposure, proximity to the house, and desired views. Measure the desired area to determine the dimensions of your patio, ensuring it complements the existing landscaping. Sketching a simple layout on paper will help visualize the final design.
Next, select the flagstone material. Various types are available, each with its unique characteristics, including color, texture, and thickness. Choose flagstones that complement your home's architecture and desired ambiance. Research different types and obtain samples to compare their appearance in your backyard.
Finally, gather the necessary tools and materials. These typically include:
- Flagstone
- Level
- Masonry sand
- Compacting tamper
- Shovel
- Wheelbarrow
- Measuring tape
- String line
- Safety glasses
- Work gloves
- Optional: Landscape fabric, edging materials, paver base (gravel or crushed stone)
2. Site Preparation
Once the planning is complete, focus on preparing the site for construction. This involves removing vegetation, excavating the area, and ensuring proper drainage.
Begin by clearing any existing vegetation, including grass, weeds, and shrubs. Use a shovel or a sod cutter for this purpose. Once the area is cleared, mark out the outline of your patio using string lines and stakes.
Next, excavate the ground to a depth of approximately 4-6 inches. This depth will accommodate the base layer and the flagstone. Use a shovel or a mini excavator for this step. If drainage is a concern, consider creating a slight slope to direct water away from the house.
After excavation, compact the soil thoroughly to prevent settling. Use a compactor or a heavy object to ensure a solid foundation for your patio.
3. Base Installation
The base layer plays a crucial role in providing support and drainage for the flagstone. This involves installing a bed of gravel or crushed stone, followed by a layer of masonry sand.
Begin by spreading a layer of gravel or crushed stone, approximately 2-3 inches deep, evenly over the compacted soil. This layer provides drainage and prevents the sand from compacting too tightly.
Next, spread a layer of masonry sand, about 1-2 inches deep, over the gravel. This sand layer provides a smooth, level surface for the flagstone. Use a rake or a shovel to distribute the sand evenly.
After spreading the sand, compact it lightly with a tamper to create a firm, level bed. The base layer should be perfectly level to ensure even flagstone installation.
4. Flagstone Installation
With the base layer prepared, you can begin installing the flagstone. This involves positioning and leveling the flagstones, ensuring a visually appealing and functional patio.
Start by laying out the flagstones in a dry-fit arrangement. This means placing the flagstones in their desired positions without using any mortar or adhesive. This step helps visualize the layout and adjust the flagstones for a pleasing aesthetic arrangement.
Once satisfied with the arrangement, start to install the flagstones permanently. Begin by placing the flagstones on the sand bed, leaving a small gap between each stone for expansion and drainage. Ensure the stones are level using a level and adjust their positions as needed.
For larger flagstones or areas with heavy foot traffic, consider using mortar to secure the stones in place. Apply mortar to the bottom of the flagstone and carefully position it on the sand bed. Use spacers to maintain consistent gaps between the flagstones.
As you install the flagstones, compact the sand around them gently to ensure a stable base. This process creates a firm bond between the stones and the sand, preventing them from shifting.
5. Finishing Touches
Once the flagstones are installed, add finishing touches to enhance the patio's appearance and functionality. This may include laying down edging materials, planting landscaping around the perimeter, and adding furniture and decorative elements.
To define the patio's perimeter and prevent the sand from spilling out, install edging materials. These can be made of various materials, such as stones, wood, or metal. Choose a style that complements the overall design of your patio.
Add landscaping elements around the patio to create a cohesive and inviting space. Plant flowers, bushes, or trees to soften the edges of the patio and add visual interest.
Finally, add furniture and decorative elements to personalize your patio. Choose outdoor furniture that suits your style and needs, and consider adding accessories such as cushions, rugs, and lighting fixtures.

How To Build A Flagstone Patio In One Day Merrypad

How To Build A Flagstone Patio In One Day Merrypad

How To Install A Flagstone And Gravel Patio Or Pathway

Flagstone Patios How To Guide Paving Cost Diy Vs Contractor Install Mutualmaterials Com

Flagstone Patio Diy Livingston Farm Outdoor Structures Landscaping S And Creative Spaces In Vermont

How To Install A Flagstone Walkway True Value

How To Lay Flagstone Installation Guide Landscaping Network

How To Lay A Flagstone Patio For Outdoor Living Space Digging

Installing A Flagstone Patio Stones Outdoor Decor

How To Lay A Flagstone Patio Merrypad
Related Posts


